💻 Device Setup Guide
This guide is for school IT preparing student devices before hackathon day. The goal is simple: at least one working laptop per hackathon team with Kiro installed and signed in.
Each team is usually 3–4 students sharing one laptop. Most schools will only need to set up a handful of devices. No need for mass deployment — focus on getting a small number ready and tested well.
Kiro does not run on ChromeOS (Chromebooks). Devices must run macOS or Windows (x64). If your school primarily uses Chromebooks, contact the event organisers to discuss alternatives.
Kiro is completely free to use. Students sign in with a personal Google (Gmail) account — no AWS account, credit card, or special setup needed.
🖥️ Minimum System Requirements
| Requirement | Details |
|---|---|
| macOS | Intel or Apple Silicon (M1/M2/M3+) |
| Windows | 64-bit (x64) — ARM is not supported |
| Internet | Stable connection — Kiro needs internet for all AI interactions |
| Browser | Google Chrome (latest stable version) |
| Disk space | At least 2 GB free for Kiro, Node.js, and the starter project |
Linux works with Kiro but is not covered by this setup guide. If a student needs to use a Linux machine on the day, contact the event organisers ahead of time.
✅ Pre-Event Checklist
Complete these steps on every device that will be used by a hackathon team. Do this at least one week before your event date so there's time to fix issues.
1️⃣ Download and install Kiro
Download Kiro from kiro.dev/downloads and install it for the appropriate platform.
- macOS
- Windows
-
Download the
.dmginstaller from kiro.dev/downloads. There are two Mac builds — pick the one that matches your chip:- Apple Silicon (
arm64) — M1, M2, M3, or newer. - Intel (
x64) — older Macs.
Not sure which Mac you have?Click the Apple menu (🍎) → About This Mac and check the Chip line. Anything starting with "Apple M" → Apple Silicon. Anything mentioning Intel → Intel.
- Apple Silicon (
-
Open the
.dmgfile and drag Kiro into the Applications folder. -
Launch Kiro from Applications. If macOS Gatekeeper blocks the app, go to System Settings → Privacy & Security and click Open Anyway.
- Download the
.exeinstaller from kiro.dev/downloads. - Run the installer and follow the on-screen prompts.
- If Windows SmartScreen displays a warning, click More info → Run anyway.
2️⃣ Download and install Node.js LTS
Node.js is required to run student projects locally.
- macOS
- Windows
- Download the macOS installer (
.pkg) from nodejs.org. - Run the installer and accept the defaults.
- Verify by opening Terminal and running:
node --version
You should see a version number (e.g. v22.x.x).
- Download the Windows installer (
.msi) from nodejs.org. - Run the installer and accept the defaults.
- Verify by opening Command Prompt and running:
node --version
You should see a version number (e.g. v22.x.x).
3️⃣ Ensure Google Chrome is installed
Students will use Chrome to preview their apps. If Chrome isn't already installed, grab it from google.com/chrome.
4️⃣ Download the starter projects
There are five starter projects — one per problem theme. The event organiser will tell you which starter(s) your school's teams will use. Download the matching ZIP(s) onto each team device and extract to a known location (e.g. the desktop).
Direct ZIP downloads:
- 🌊 Water Watch NZ (ocean / water pollution) — Download ZIP
- 💛 How Are You Today? (youth wellbeing) — Download ZIP
- 🍲 Kai Share (community food sharing) — Download ZIP
- 🦎 Kaitiaki Watch (native species conservation) — Download ZIP
- ♻️ Green School Tracker (school sustainability) — Download ZIP
The full list with Git repo URLs and project descriptions is on the Resources page.
If the device has internet during setup, open a terminal in the extracted starter folder and run npm install once. The day-of npm start will then be instant — students don't have to wait for dependencies to download on hackathon morning.
5️⃣ Open Kiro and sign in with Google
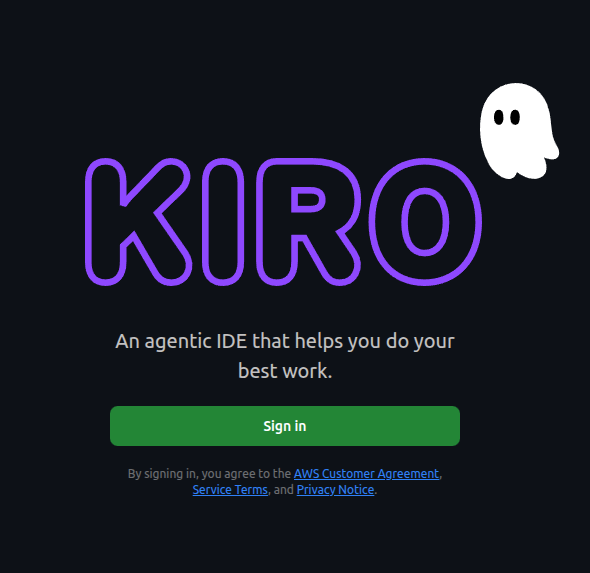
Launch Kiro for the first time. You'll see a welcome screen — click the green Sign in button:
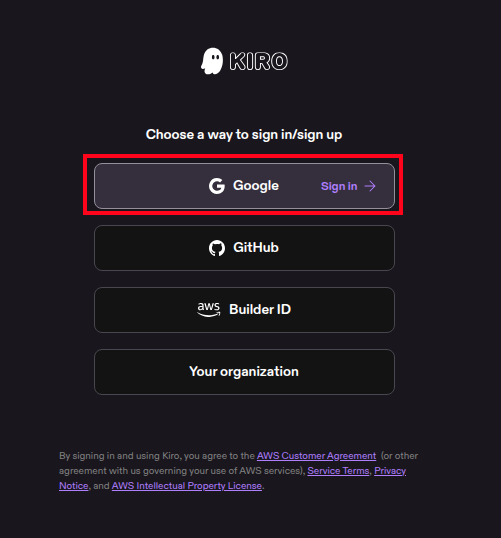
Kiro will then ask how to sign in. Click Google and sign in with a personal @gmail.com account:
Confirm Kiro opens to the main editor without errors. That's it — no AWS account, no credit card, no extra setup.
Many school Google Workspace tenants block third-party OAuth apps by default, which causes "This app is blocked by your administrator" errors. A standard personal @gmail.com avoids that whole class of problem.
Use one shared Gmail to verify everything works on each device, then sign out. Students will sign in with their own personal Gmail accounts on the day.
Kiro also supports GitHub, AWS Builder ID, and Your organization SSO. If a student genuinely can't use a personal Google account, contact the event organisers and we'll help you choose the next-best option.
6️⃣ Run a smoke test
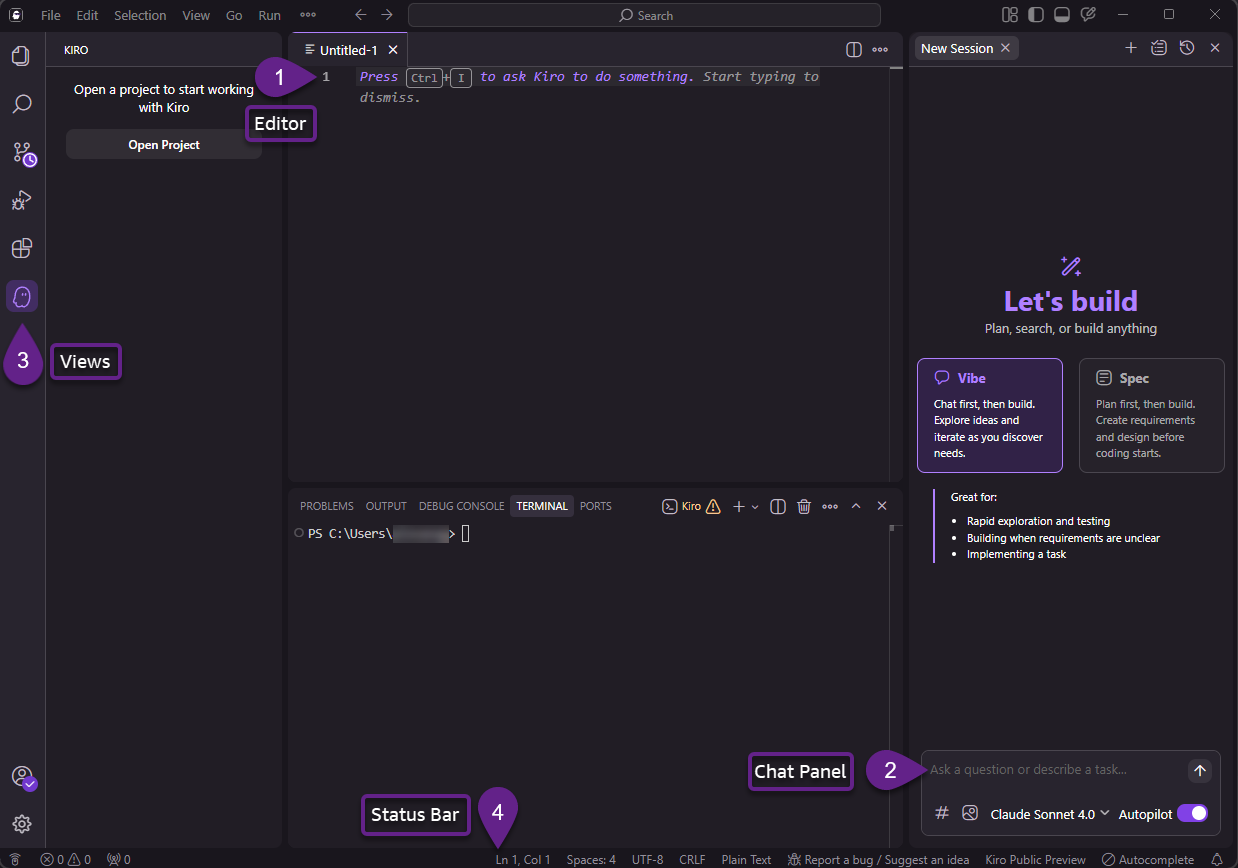
Confirm Kiro is actually working end-to-end. The Kiro window is split into a few areas:
-
In the Chat Panel on the right (the box labelled "Ask a question or describe a task..."), type a simple prompt:
Say hello -
Press Enter and wait a few seconds.
-
Confirm Kiro returns a response in the chat. This proves the device has internet, Kiro is signed in, and the AI features are functional.
Repeat this smoke test on every device you've set up. One untested device is one team that can't start on the day.
If anything fails at any step, head to the Troubleshooting page.
🌐 On the Day — Network Notes
The hackathon runs at Deloitte offices, where the network is configured to allow everything Kiro and npm need. You don't need to coordinate with Deloitte's network team.
The work that matters is making sure Kiro is installed and signed in at the school before the day. Once Kiro is on the device and authenticated, it will work fine on the Deloitte Wi-Fi.
📞 Support
Reach out to the regional point of contact for your school — they'll help with pre-event setup issues, device questions, and anything else that comes up.
- Auckland & Hamilton — Fathin Doray — [email protected]
- Wellington — Shane Kelly — [email protected]